This post may contain affiliate links. Read our privacy policy.
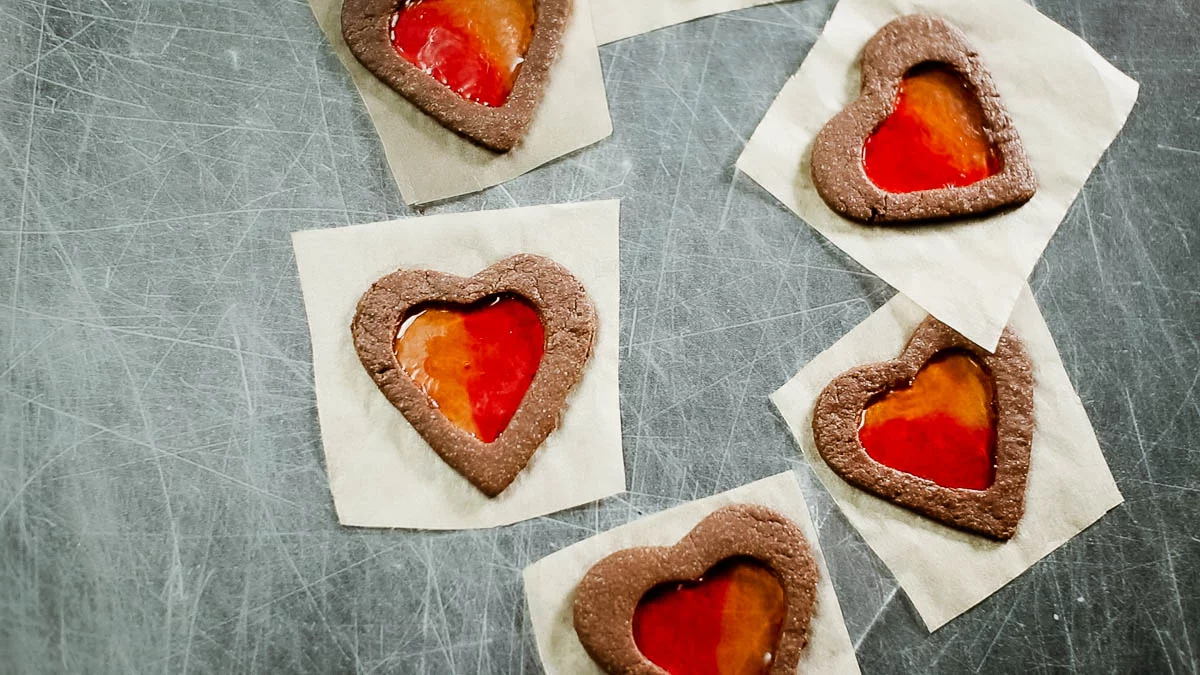
Just bake the cookies and place gummy candies on top! This is a recipe for stained glass cookies made with gummy candies that is easy to make and perfect for gifts.

Jump to:
Watch the recipe video
Easy Stained Glass Cookies Made with Gummy Candies!

During Christmas, I made stained glass cookies using candy, but this time I have a recipe using gummy candies.
Using candy required the extra step of crushing and reheating it in the oven to melt, which was a bit challenging to adjust.
However, this time, all you need to do is bake the cookies and then place the gummy candies on top. They melt easily with the residual heat from baking the cookies, making it very simple.
To make them suitable as Valentine's Day gifts, I tried placing red gummy candies on heart-shaped cocoa cookies.
Ingredients
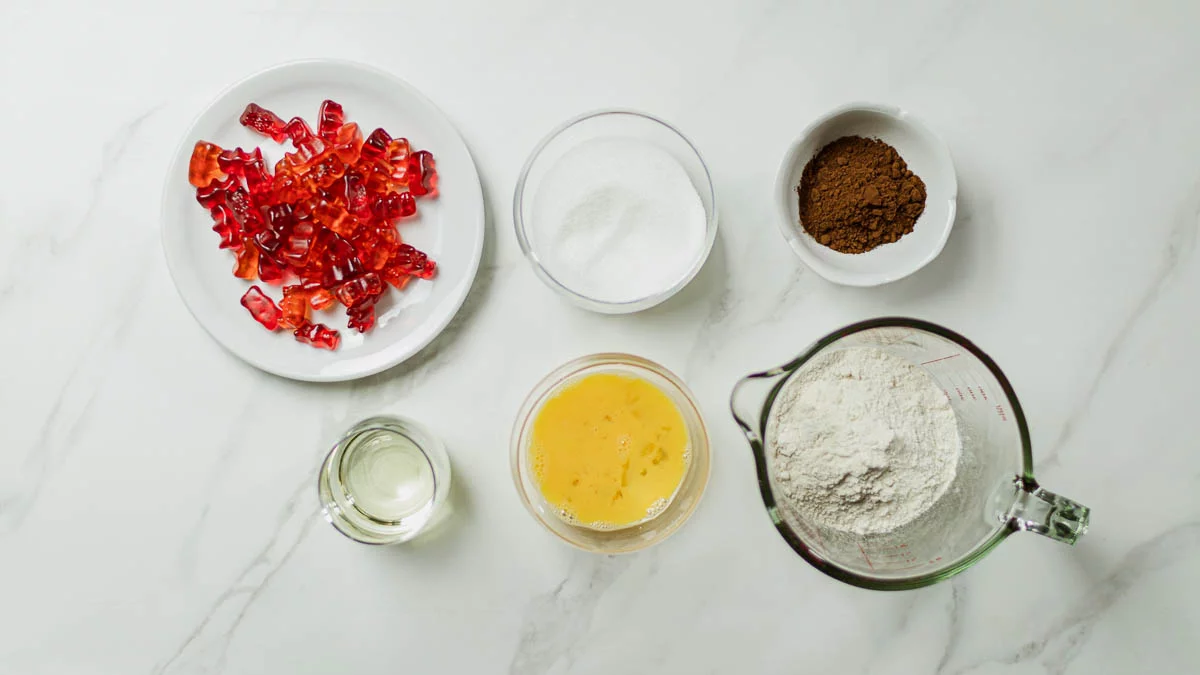
- Cake flour
- Cocoa powder
- Granulated sugar
- Vegetable oil - For the convenience of easy preparation, I used vegetable oil instead of butter for the cookies. It doesn't require bringing it to room temperature or kneading, so it's easier. The result is a lighter and firmer texture compared to using butter.
- Eggs
- Gummy candies (red) - I used Haribo Gold Bears in red. Since a single bag may not have enough red candies as it contains various colors and flavors, you may need 2-3 small bags. Mixing different colors together also creates a cute effect.
This is a mixture of red and orange.
Instructions
- Prepare a baking sheet lined with parchment paper.
- Preheat the oven to 170°C (340°F) about 10 minutes before using it.
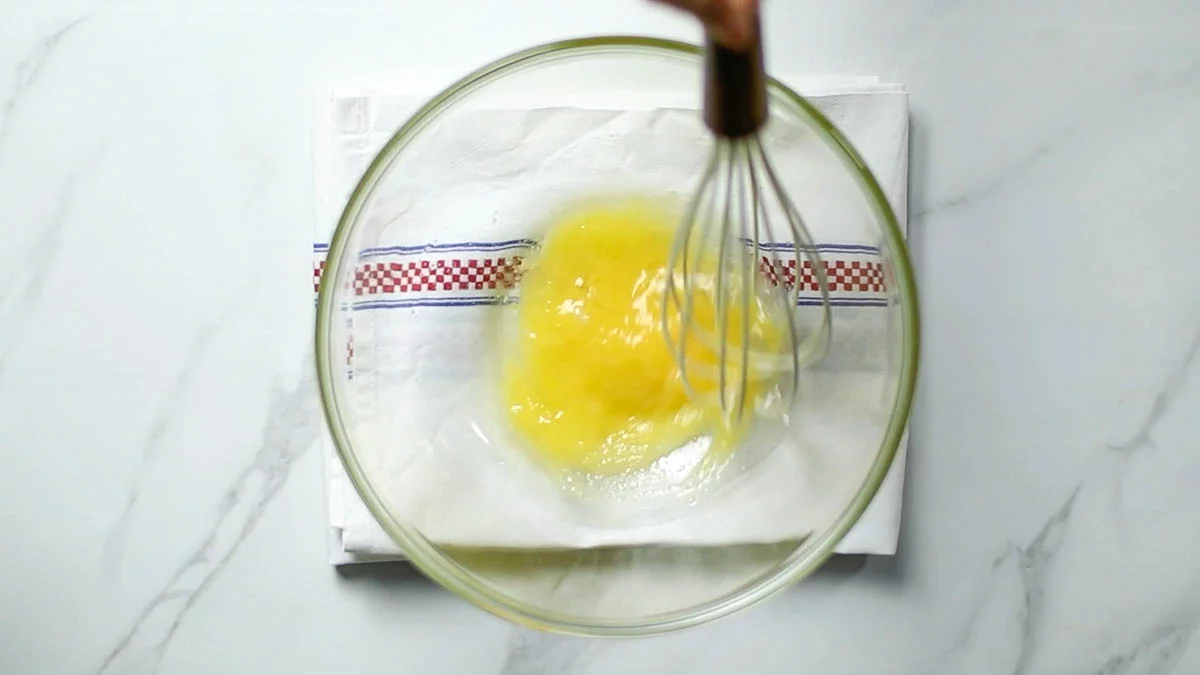
In a bowl, whip together the eggs, vegetable oil, and granulated sugar.
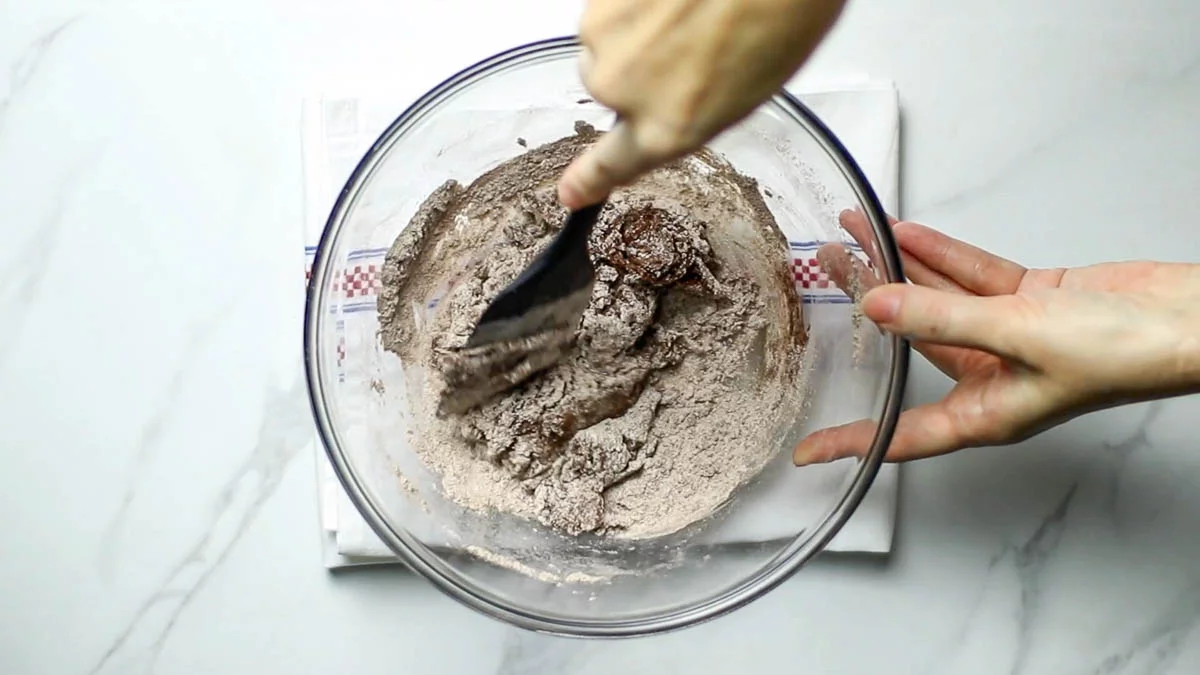
Sift in flour and cocoa powder.
Wrap the dough in plastic wrap and let rest in the refrigerator for 30 minutes.
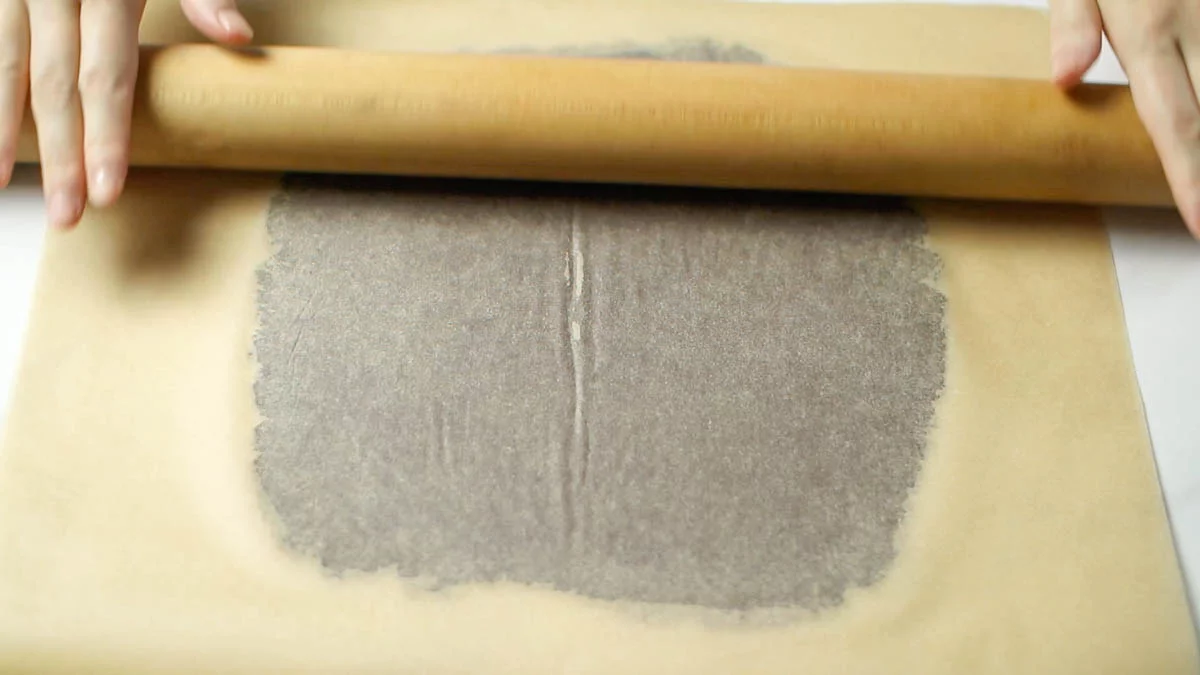
Prepare two large baking sheets and place the dough between them. Use a rolling pin to roll it out to a thickness of about 3mm (0.12 inches).
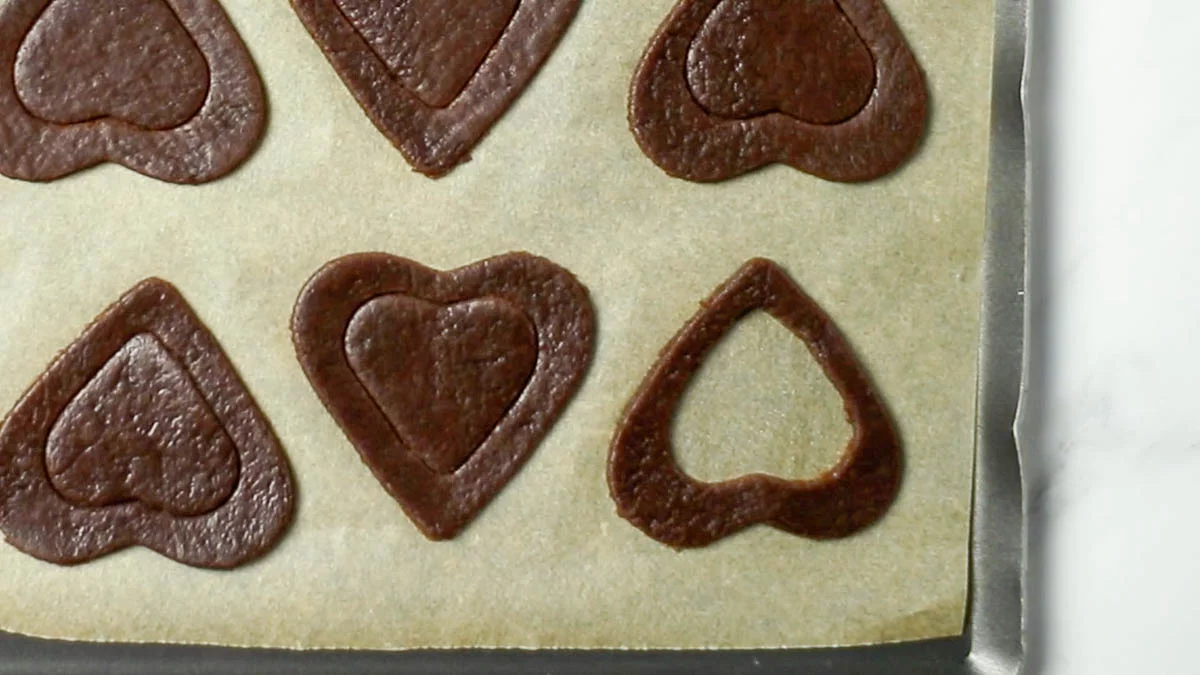
Cut out the large heart shapes, then transfer to a baking sheet and hollow out the inside with the smaller heart shapes.
Bake in a preheated 170°C (340°F) oven for 12-15 minutes.
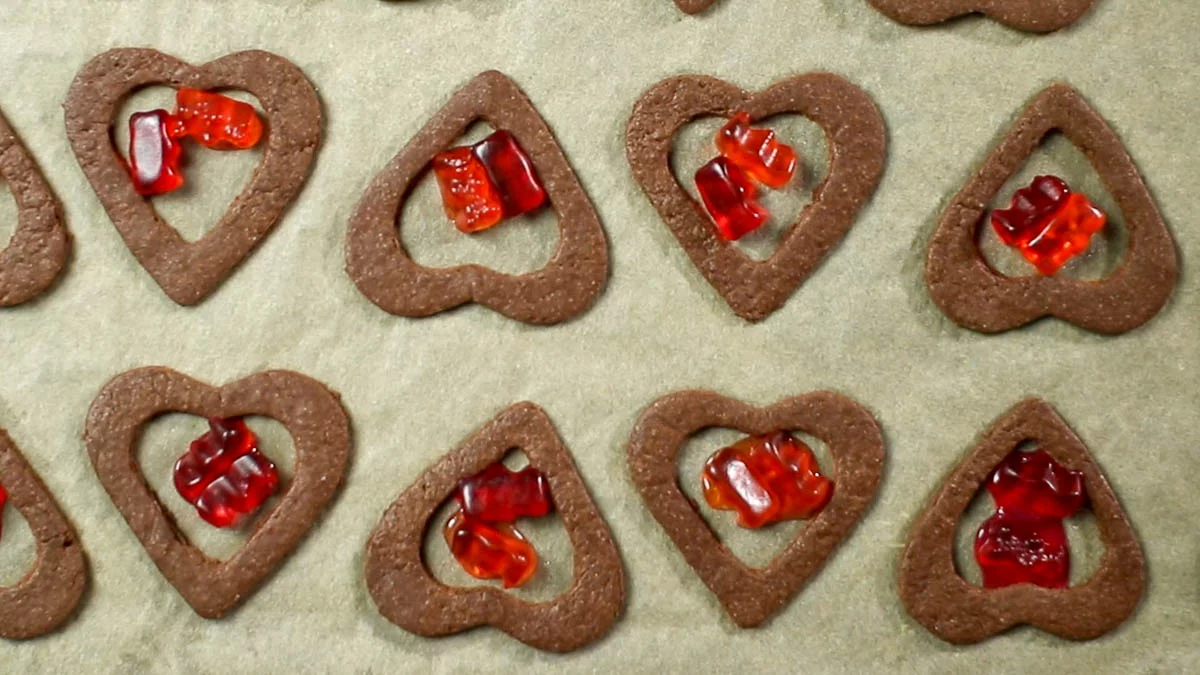
Once the cookies are done baking, remove them from the oven and immediately place two gummy candies inside each heart-shaped hollow. (*The residual heat from the baking sheet will melt the gummy candies, but if they don't melt completely, you can place them inside the turned-off oven to melt with the residual heat.)

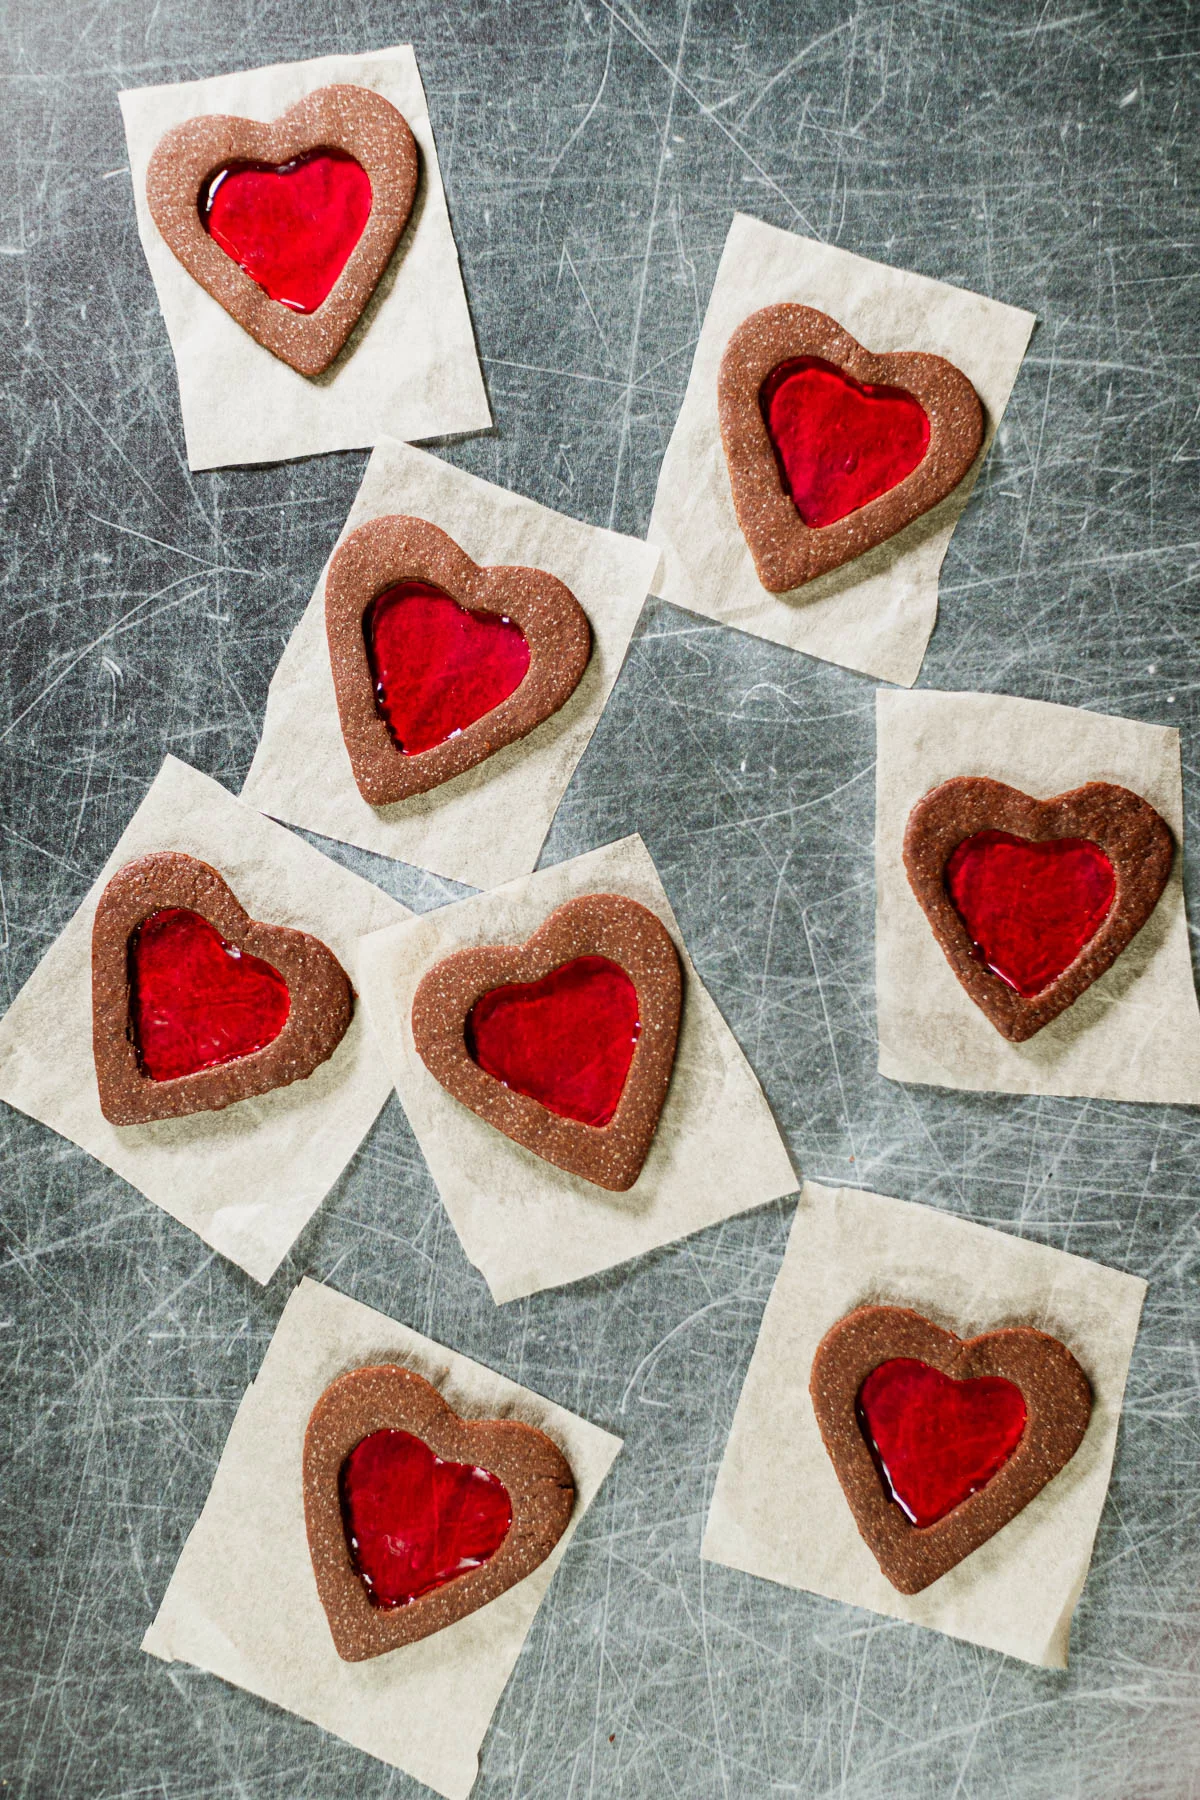
Once the gummy candies have solidified, the cookies are ready!
Storage
The gummy part indeed becomes stickier compared to before melting.
When making candy stained glass cookies, I initially thought that the gummy candies would dry and harden like the melted candy once they cooled.
However, even after baking and allowing some time to pass, the gummy candies remained stuck firmly to the baking sheet, and it was difficult to remove them without gently peeling them off.
I also tried leaving them for 2-3 days, hoping they would dry out, but they didn't change.
While the taste and texture remain the same, the increased stickiness can be a challenge when placing them on a plate or wrapping them as gifts with wrapping paper. In those cases, I recommend cutting the cookies along with the baking sheet. If you stack them with the baking sheet intact, they won't stick together.
Shelf life
Place the cookies in a storage container such as a Tupperware and store them at room temperature in a cool, dark place. They can last for 3 to 4 days.
Check out new recipes!


Gummy Bear Stained Glass Cookies
- Total Time: 27 minutes
- Yield: 15 cookies 1x
Description
Just bake the cookies and place gummy candies on top! This is a recipe for stained glass cookies made with gummy candies that is easy to make and perfect for gifts.
Ingredients
- 90g cake flour
- 10g cocoa powder
- 40g granulated sugar
- 30ml vegetable oil
- ½ egg
- Gummies (red)
Instructions
Preparation
- Prepare a baking sheet lined with parchment paper.
- Preheat the oven to 170°C (340°F) about 10 minutes before using it.
Cocoa Stained Glass Cookies
- In a bowl, whip together the eggs, vegetable oil, and granulated sugar.
- Sift in flour and cocoa powder.
- Wrap the dough in plastic wrap and let rest in the refrigerator for 30 minutes.
- Prepare two large baking sheets and place the dough between them. Use a rolling pin to roll it out to a thickness of about 3mm (0.12 inches).
- Cut out the large heart shapes, then transfer to a baking sheet and hollow out the inside with the smaller heart shapes.
- Bake in a preheated 170°C (340°F) oven for 12-15 minutes.
- Once the cookies are done baking, remove them from the oven and immediately place two gummy candies inside each heart-shaped hollow. (*The residual heat from the baking sheet will melt the gummy candies, but if they don't melt completely, you can place them inside the turned-off oven to melt with the residual heat.)
- Once the gummy candies have solidified, the cookies are ready!
Notes
The gummy part tends to become sticky even after cooling. If you plan to use them as gifts or when placing them on a plate, it is recommended to cut the cookies along with the baking sheet to prevent sticking.
- Prep Time: 15 minutes
- Additional Time: 0 hours
- Cook Time: 12 minutes
- Category: Cookies
- Cuisine: American
Nutrition
- Serving Size: 1
- Calories: 59
- Sugar: 4
- Sodium: 3
- Fat: 2
- Saturated Fat: 0
- Unsaturated Fat: 2
- Trans Fat: 0
- Carbohydrates: 9
- Fiber: 0
- Protein: 1
- Cholesterol: 6
Leave a Reply