This post may contain affiliate links. Read our privacy policy.
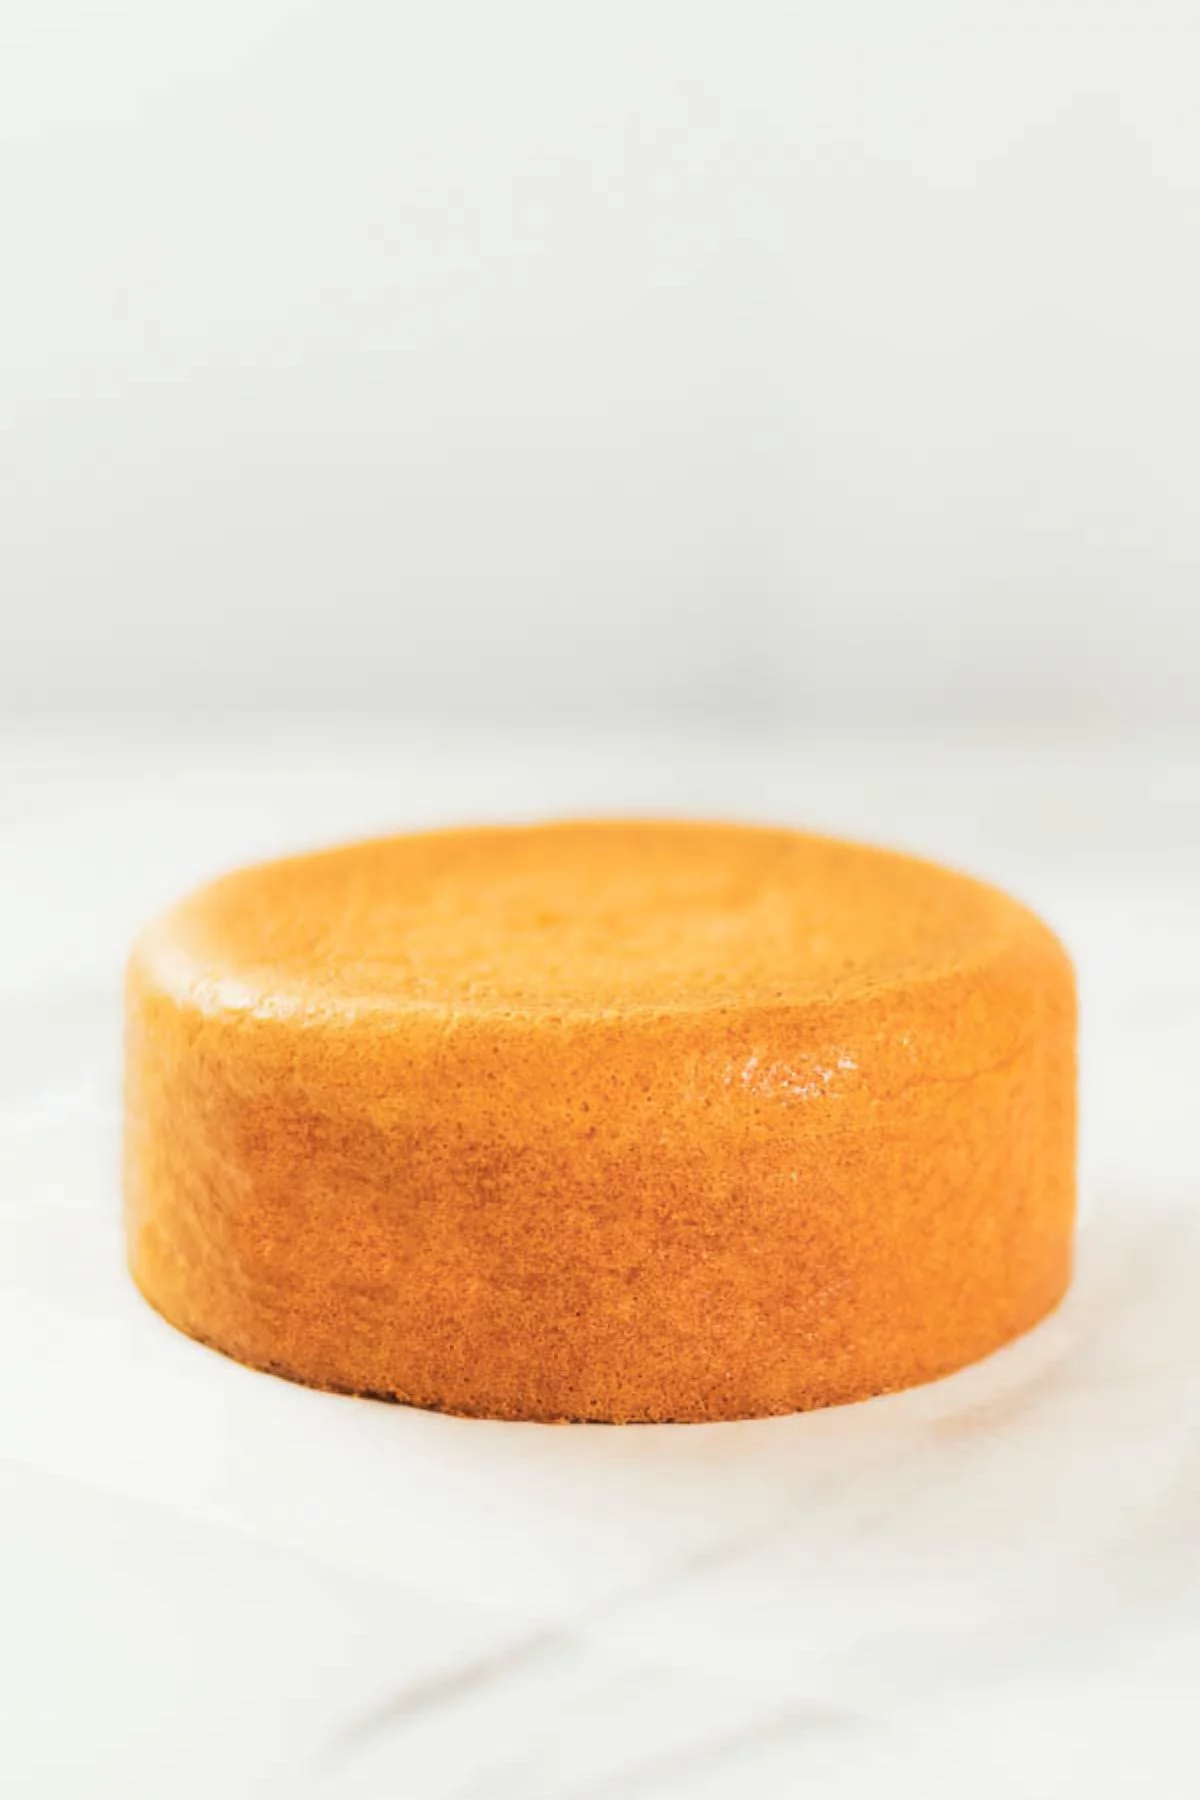
Sponge cake is the basis of baking! Here are some tips on how to make a fluffy and moist sponge cake without making mistakes.
Jump to:
Watch the Recipe Video
Sponge cake, the basis of baking
Sponge cake, which is used as the base for various desserts. It is a truly fundamental sponge cake that can be made quickly with ingredients you have at home, but surprisingly, it can be a tricky cake that requires some tips.
Recently, it seems that sponge cakes have become softer and more airy, resembling chiffon cakes.
As a result, the amount of moisture in the batter has increased, making it more challenging to handle both during preparation and after baking. If not handled properly, the cake may not rise well or deflate, making it more prone to failure.
Sponge cake, cause of failure
the sponge cake doesn't rise
Cause: Insufficient or overmixed dough
When whisking the egg yolks and egg whites together, there is a slight technique involved.
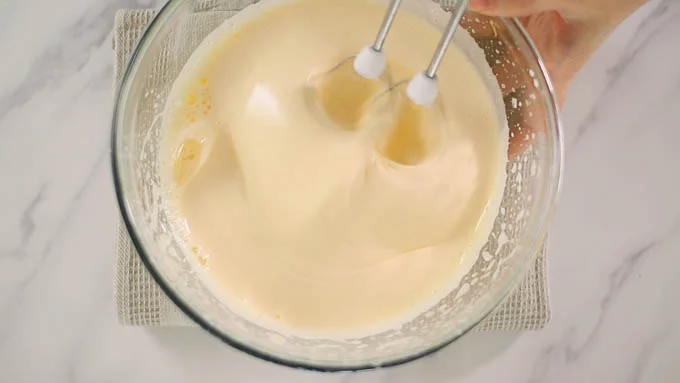
Start by whisking the mixture at high speed using a hand mixer to create large bubbles. Then, switch to low speed and gradually transform the large bubbles into smaller ones, creating a fine-textured batter.
The finished batter should have a thick consistency. When you draw a figure-eight shape, the trace should gradually disappear. If you whisk the batter for too long, leaving distinct and lasting traces, the bubbles in the batter may dissipate during the process of incorporating other ingredients.
(If you whip the eggs while warming them in a hot water bath, the viscosity of the eggs will weaken, making them easier to whip, but in the case of a hand mixer or stand mixer with stirring power, it is easier to produce fine foam without warming the eggs, so we do not warm the eggs. If whipping by hand, it is easier to whip while warming.)
Cause: After whisking at high speed, not whisking sufficiently at low speed
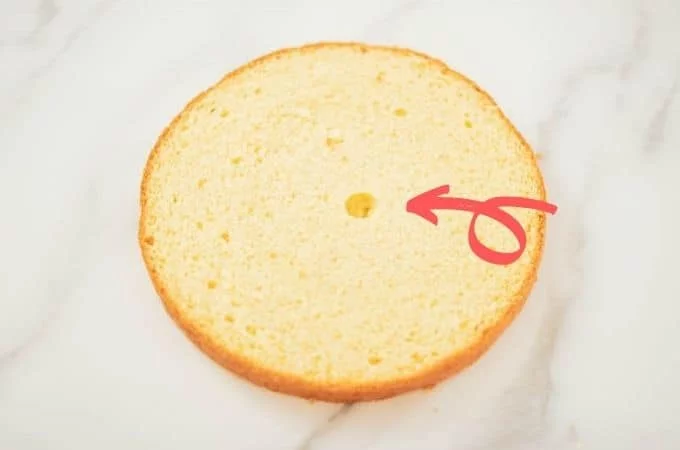 Large bubbles remain in some places
After whisking at high speed, it is important to thoroughly reduce the size of the bubbles at low speed. If the bubbles are not adequately broken down, large bubbles may remain. Large bubbles are less stable and prone to collapsing, which can also prevent proper rising of the cake.
After baking, it deflates.
Cause: Not well baked inside.
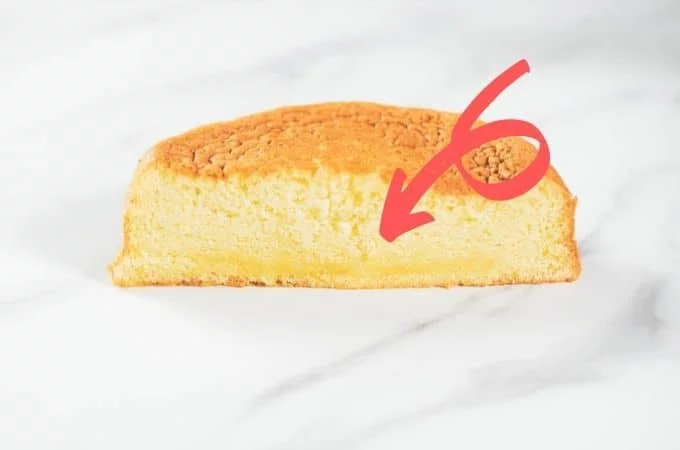
If you take the cake out of the oven once the surface has browned nicely and it appears to have risen well, thinking it's done, it may shrink progressively as it cools.
When you cut into it, you may find areas where the texture is dense and it hasn't baked properly.
To determine if it's baked through, lightly press the highest point of the cake, which should be domed, with your finger. It should spring back and not leave an indentation. Another indicator is to insert a skewer into the center; it should come out clean without any batter sticking to it.
Sponge cakes often require a considerable amount of time to bake properly if they have significant height, so make sure to adjust the temperature to prevent excessive browning and ensure it is thoroughly baked.
Cause: Flour not well mixed into dough
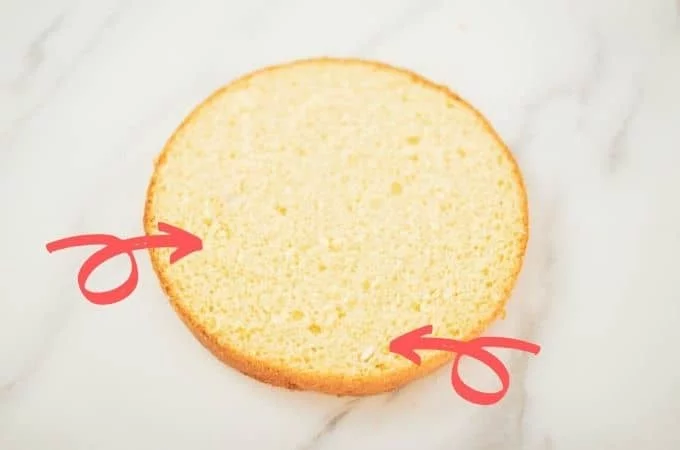
It's a bit hard to see, but there are clumps of flour remaining in some areas. When this happens, it means that the flour hasn't been properly dispersed in the batter, resulting in areas where the flour doesn't support the structure of the cake. This can be a cause for the cake to deflate.
Sometimes, despite the cake rising beautifully in the oven, it gradually deflates and ends up shrinking by about one size smaller when taken out of the oven. It's natural for a cake to deflate a bit, but if it collapses to the point where wrinkles form all over, there might be an issue somewhere.
For example, soufflés tend to deflate gradually if not eaten right after being taken out of the oven. Even soufflé cheesecakes tend to shrink to some extent as they cool down.
The reason behind this is that both soufflés and soufflé cheesecakes have very little (or no) amount of flour. They are meant to be enjoyed in their fluffy texture during the brief moment they rise, so the flour is minimized to achieve a light and airy texture.
Preventing deflation after cooling down is where the flour comes into play. Flour helps support the air bubbles in the batter and prevents excessive deflation during cooling.
Therefore, if the cake deflates significantly after cooling, it could be due to issues such as inadequate mixing of the flour into the batter.
The sides of the cake cave in
Cause: Not dropping the cake pan from a height after baking.
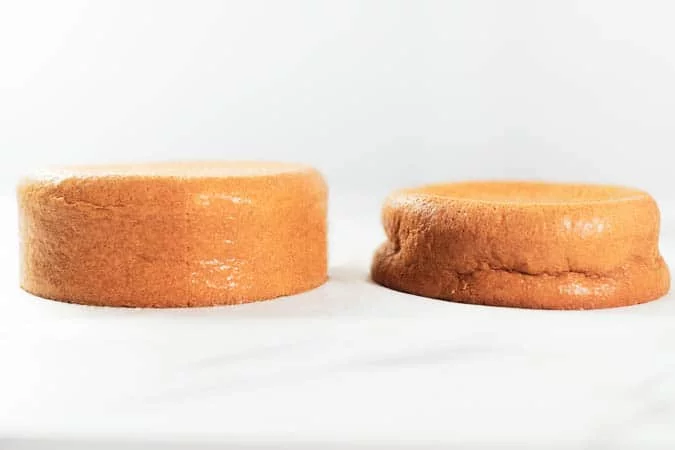
Sometimes, even when the cake rises well and looks great in the pan, it deflates rapidly and develops wrinkles on the sides as if air is escaping from the center when it's removed from the pan.
There is some overlap with the previous cause mentioned, but there was a period where only the sides of the cake would consistently cave in. It was a different kind of collapse compared to the overall deflation, so I decided to investigate the cause.
In some tips for making sponge cake, there is an explanation to "drop the cake pan from a height after baking to release steam." Initially, I didn't fully understand the purpose of this step because I had been using recipes with less moisture (without adding liquids like milk), and the cakes turned out well without this step.
However, when baking a cake with a higher moisture content to achieve a fluffy texture, steam tends to get trapped inside the pan when it's taken out of the oven. If the steam isn't released properly, it can cause the cake to deflate. That's why the step of dropping the pan from a height after baking becomes necessary to release the trapped steam.
How to make sponge cake
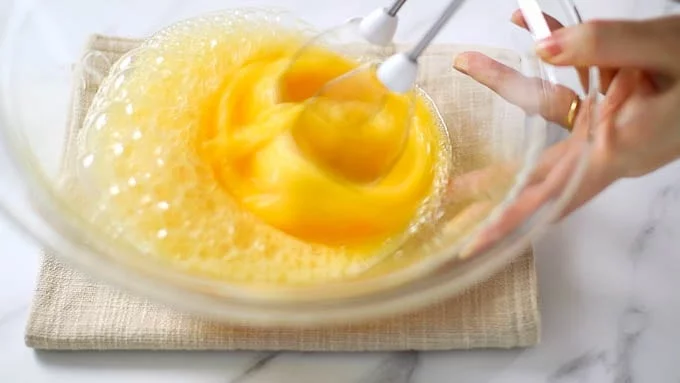
Prepare the cake pan by lining the bottom and sides with parchment paper. (I'm using a reusable oven sheets this time, which helps achieve clean sides.) Preheat the oven to 175°C (350°F).
In a bowl, combine the eggs and sugar, then whisk them together using a handheld mixer or a stand mixer on high speed. Whisking on high speed will increase the volume of the batter. The duration may vary depending on the mixer model, but whisk for about 3 to 4 minutes.
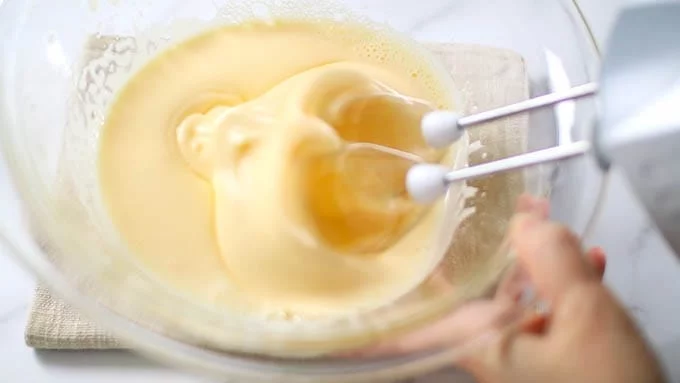
Once the batter becomes pale and slightly thickened, switch to low speed. By whisking on low speed, you'll transform the batter, which has increased in volume with large bubbles, into a finer texture with smaller bubbles, creating a more delicate and refined batter.
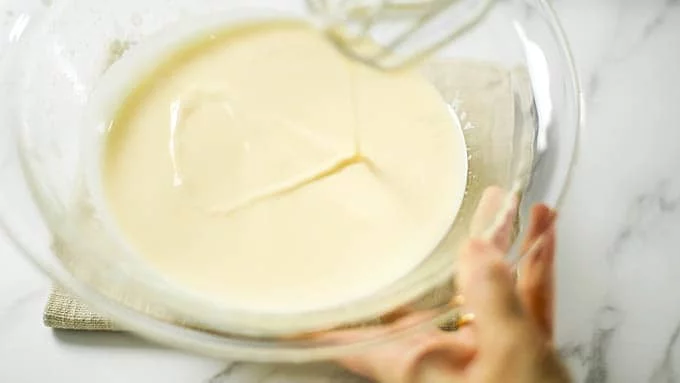
Whisk for approximately 10 minutes until the batter becomes pale and the texture thickens. To check the consistency, lift the batter and draw an "8" shape. The trail should slowly disappear, indicating that you've achieved the desired level of whisking.
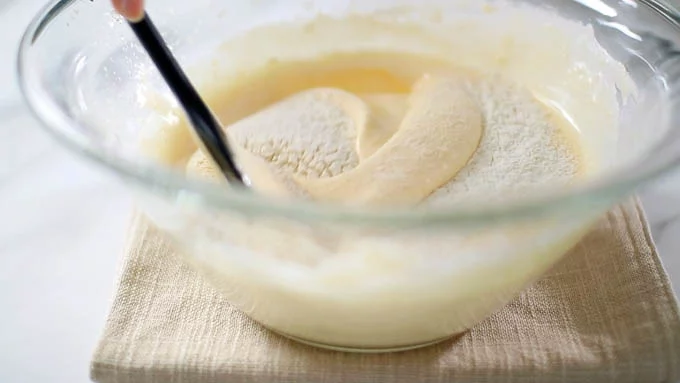
Sift the cake flour in three separate additions. This will help eliminate lumps and ensure even distribution throughout the batter. While rotating the bowl, use a rubber spatula to scoop the batter from the bottom and gently fold it over, incorporating the flour mixture. Mix it lightly and evenly.
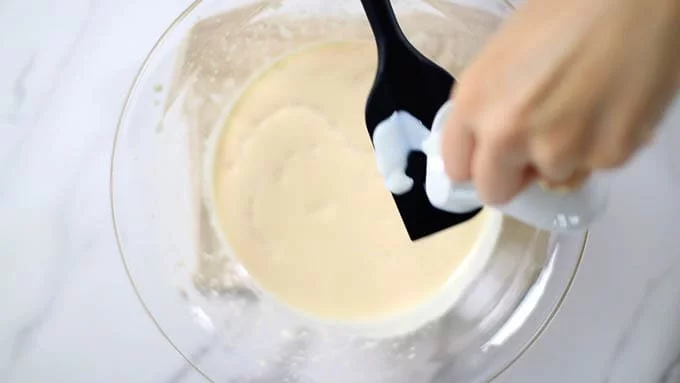
Add the milk and vegetable oil to the batter while transferring them onto the rubber spatula, then pour them into the mixture while continuously mixing. It's preferable to use milk at room temperature as it blends more easily into the batter. Mix quickly and thoroughly.
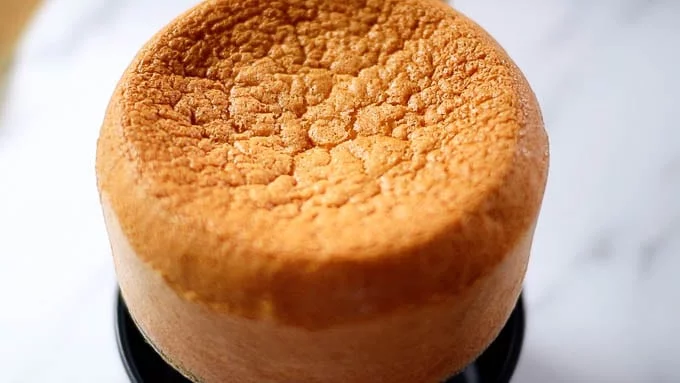
Bake in a preheated oven at 175°C (350°F) for 25-30 minutes. To check if it's done, lightly press the highest point of the cake with your finger. If it springs back and no indentation remains, it is baked properly.
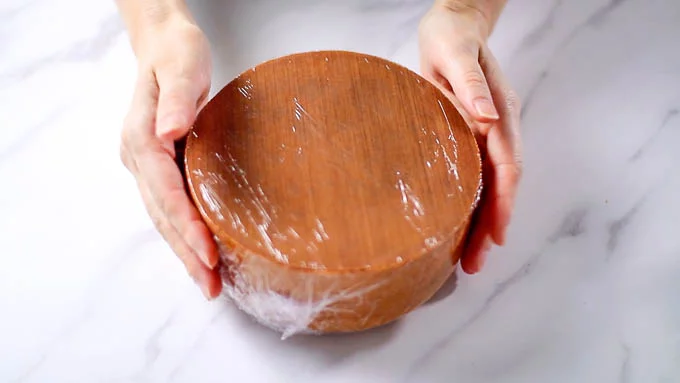
Immediately after baking, drop the pan to release the steam. This helps prevent the cake from collapsing. Once it has cooled to the touch, remove it from the pan and wrap it with plastic wrap. Flip it upside down for storage. (Leaving the oven sheet on the bottom helps prevent the bottom of the cake from sinking.)
Sponge cake that is moist and fluffy
It turns out fluffy like a chiffon cake, and since I started using this sponge cake recipe, I rarely have to soak syrup.
It takes a few tricks, but by all means, try making a fluffy sponge cake!
Equipment
I usually use a removable-bottom pan and reusable oven sheets for cake baking. The removable-bottom pan makes it easy to remove the cake without damaging it, and the reusable oven sheets don't absorb moisture, resulting in clean and neat sides of the cake.


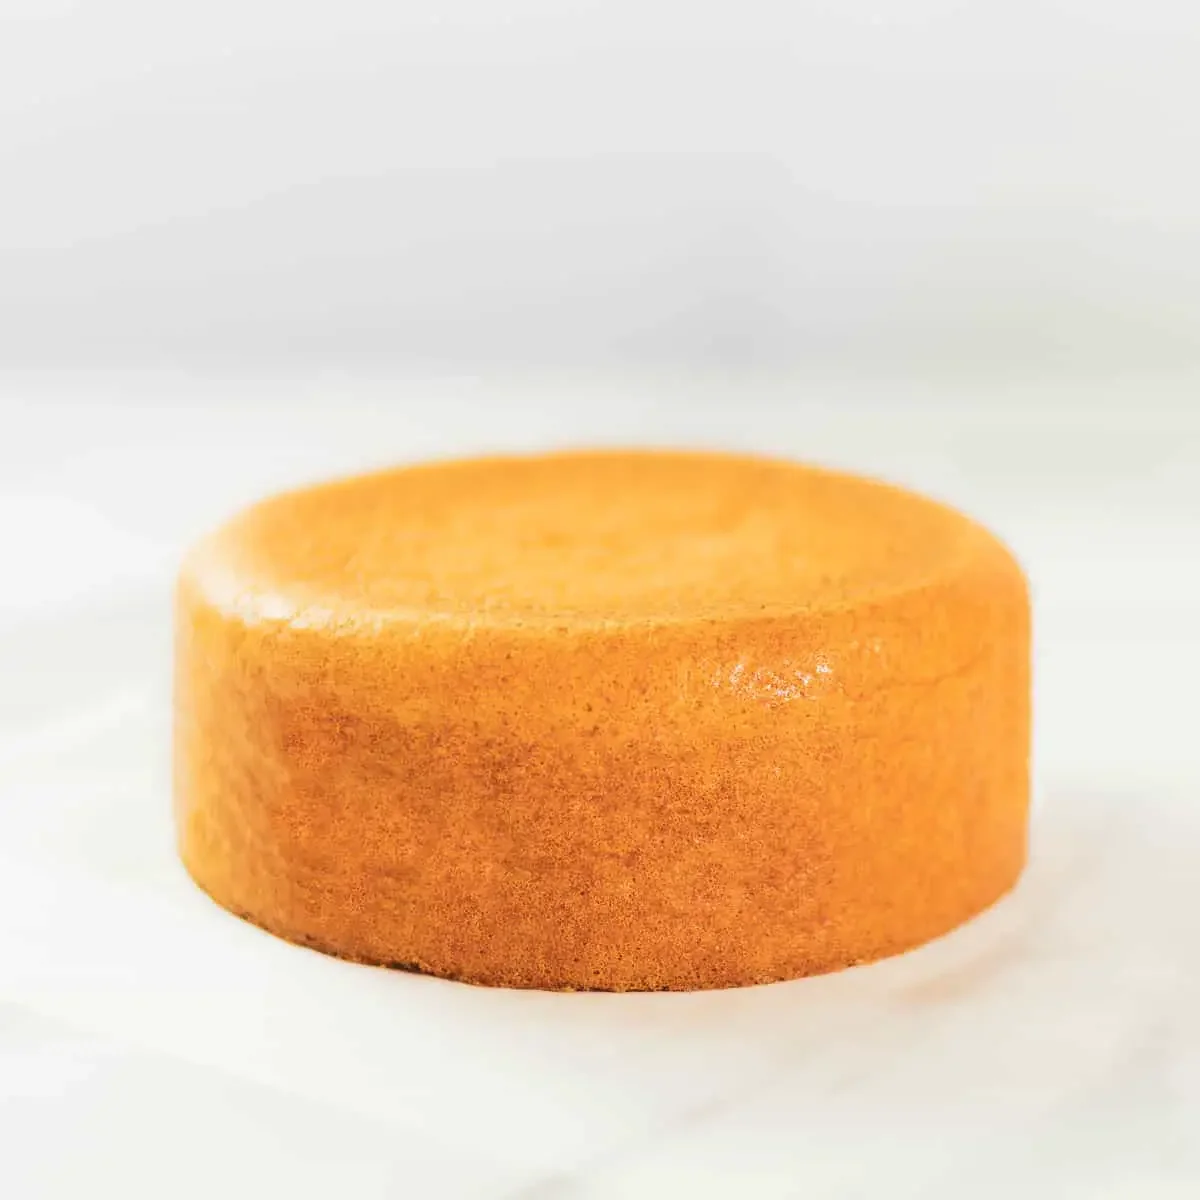
Fluffy and Moist! Never Fail Sponge Cake
- Total Time: 45 minutes
- Yield: 8 servings (15cm / 6 inches round cake pan)
Description
Sponge cake is the basis of baking! Here are some tips on how to make a fluffy and moist sponge cake without making mistakes.
Ingredients
- 3 eggs
- 65g granulated sugar
- 65g cake flour
- 15ml milk
- 15ml vegetable oil
Instructions
- Prepare the cake pan by lining the bottom and sides with parchment paper. (I'm using a reusable oven sheets this time, which helps achieve clean sides.) Preheat the oven to 175°C (350°F).
- In a bowl, combine the eggs and sugar, then whisk them together using a handheld mixer or a stand mixer on high speed. Whisking on high speed will increase the volume of the batter. The duration may vary depending on the mixer model, but whisk for about 3 to 4 minutes.
- Once the batter becomes pale and slightly thickened, switch to low speed. By whisking on low speed, you'll transform the batter, which has increased in volume with large bubbles, into a finer texture with smaller bubbles, creating a more delicate and refined batter.
- Whisk for approximately 10 minutes until the batter becomes pale and the texture thickens. To check the consistency, lift the batter and draw an "8" shape. The trail should slowly disappear, indicating that you've achieved the desired level of whisking.
- Sift the cake flour in three separate additions. This will help eliminate lumps and ensure even distribution throughout the batter. While rotating the bowl, use a rubber spatula to scoop the batter from the bottom and gently fold it over, incorporating the flour mixture. Mix it lightly and evenly.
- Add the milk and vegetable oil to the batter while transferring them onto the rubber spatula, then pour them into the mixture while continuously mixing. It's preferable to use milk at room temperature as it blends more easily into the batter. Mix quickly and thoroughly.
- Bake in a preheated oven at 175°C (350°F) for 25-30 minutes. To check if it's done, lightly press the highest point of the cake with your finger. If it springs back and no indentation remains, it is baked properly.
- Immediately after baking, drop the pan to release the steam. This helps prevent the cake from collapsing. Once it has cooled to the touch, remove it from the pan and wrap it with plastic wrap. Flip it upside down for storage. (Leaving the oven sheet on the bottom helps prevent the bottom of the cake from sinking.)
- Prep Time: 20 minutes
- Additional Time: 0 hours
- Cook Time: 25 minutes
- Category: Cakes
- Cuisine: Japanese
Nutrition
- Serving Size: 1
- Calories: 104
- Sugar: 8
- Sodium: 28
- Fat: 4
- Saturated Fat: 1
- Unsaturated Fat: 3
- Trans Fat: 0
- Carbohydrates: 15
- Fiber: 0
- Protein: 3
- Cholesterol: 70


Leave a Reply